NAT Configuration
NAT Configuration Guide
NAT (Network Address Translation) settings enable secure access to specific ports on field devices such as PLCs HMIs or IP Cameras within your local network. This is achieved by bridging the LAN, WAN, and Wi-Fi interfaces of the HUBBOX Connect X2.
1. Adding a New NAT Rule
Utilize the configuration form on the left pane to define your forwarding parameters:
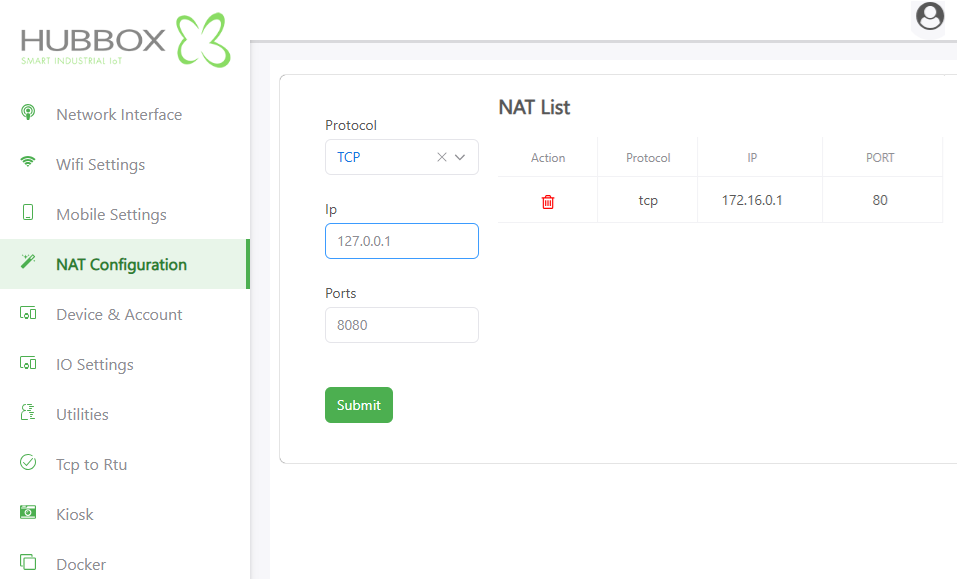
- Protocol: Select the transport layer protocol.
TCPis standard for web-based management and most industrial communication. - IP Address: Enter the internal IP of the target device (e.g.,
192.168.1.10). - Ports: Define the service port (e.g.,
80for HTTP,502for Modbus TCP,5900for VNC). - Submit: Save and apply the rule to the active configuration.
Pro Tip: The IP
127.0.0.1 used in the example represents the HUBBOX itself. For field equipment, always use the actual IP assigned to that device on the LAN.2. Managing the NAT List
The right pane displays your active routing table:
- Action: Use the trash icon to remove unnecessary rules.
- Rule Overview: Monitor the Protocol, Target IP, and Port status at a glance to verify connectivity paths.
Step-by-Step Scenario
To access the web dashboard (Port 80) of a PLC located at 172.16.0.1:
- Select TCP as the protocol.
- Input
172.16.0.1in the IP field. - Input
80in the Ports field. - Click Submit. Remote access to that PLC is now active.
Best Practices & Security
- Subnet Alignment: Ensure the target device IP belongs to the same subnet as the HUBBOX LAN port.
- Port Conflicts: Avoid mapping the same external port to multiple internal devices to prevent routing errors.
- Principle of Least Privilege: Only open specific ports required for the operation (e.g., forward
502for data but keep80closed if web management is not needed).
For technical assistance, please visit www.hubbox.io