M2M Network settings
Industrial Network Management and HUBBOX Device Registration Guide
OT/IT Integration, Device Assignment, and DHCP/IP Configuration Steps via the Central Cloud Panel
In modern IIoT (Industrial Internet of Things) and OT (Automation Technology) infrastructures, centrally managing smart routers and gateways on the field and ensuring cyber security over isolated tunnels is a critical requirement. The HUBBOX Smart Router family consolidates your factory and field networks into a single center via the cloud, without requiring complex local configurations. In this guide, you can find step-by-step instructions on how to monitor your networks through the HUBBOX management panel, register new devices to the network, and optimize local IP/DHCP parameters.
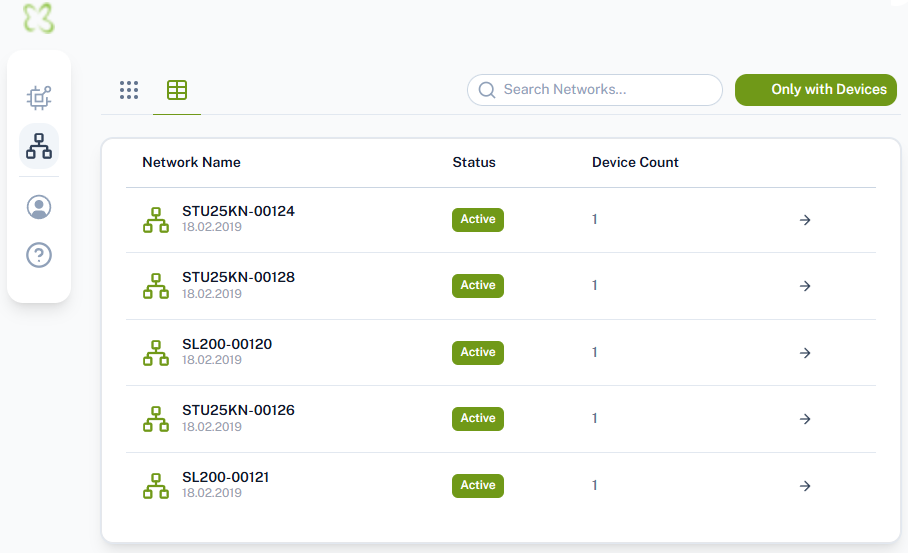
1. Central Industrial Network List and Status Monitoring
The Network Manager screen, which appears when you log into the HUBBOX control panel, consolidates all your active industrial network topologies worldwide into a single window. Through this interface, you can monitor the overall status of the networks and connected hardware in real time.
Simply click on the arrow (→) button on the right side of the list to navigate to the details of the respective network and modify its configuration.
2. Adding a New HUBBOX Edge Device to the Network (Add Device)
Follow these steps to include 4G/LTE/5G router or gateway hardware, which is registered in your system but not yet assigned to any subnet topology, into your existing industrial network infrastructure.
Image 2: HUBBOX Cloud Panel - Traffic Analytics and System Details Screen
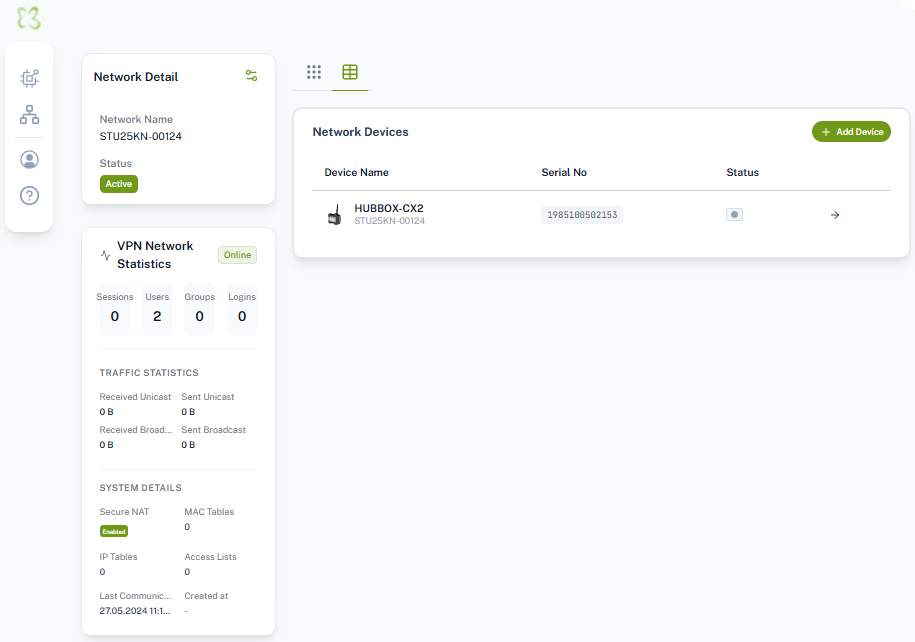
Step 01: Log into the details page of the relevant network (Network Detail) and click on the + Add Device button located in the top right corner.
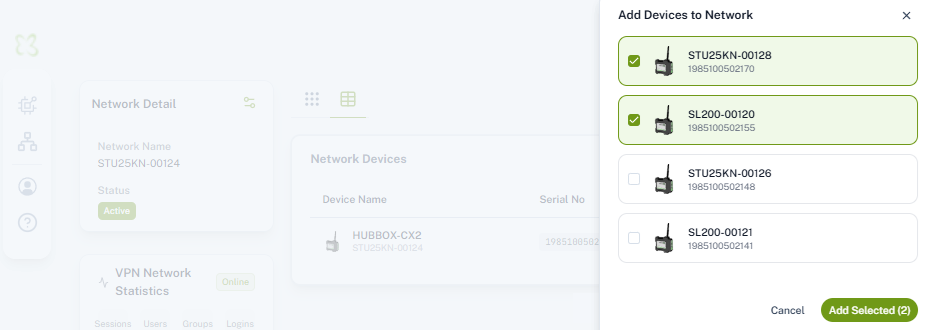
Step 02: In the opening "Add Devices to Network" window, available and unassigned hardware will be listed with their unique serial numbers.
Step 03: Check the boxes (checkboxes) next to the devices you want to include in the network:
- STU25KN-00128 (Serial No: 1985100502170)
- SL200-00120 (Serial No: 1985100502155)
Step 04: After verifying your selections, click the green Add Selected (2) button at the bottom right corner to complete the integration.
3. Network Details and Cyber Security / VPN Traffic Statistics
The Network Detail screen transparently provides the hardware parameters of the connected devices, data transmission layers, and encrypted tunnel (VPN) traffic intensity.
VPN Network Statistics
The number of concurrent authorized users (Users: 2) connected to the network via secure tunneling and active session durations are monitored in real time from this area.
Traffic Analysis (Traffic Stats)
Unicast and Broadcast data amounts within the network are tracked in Bytes (B) to proactively detect abnormal packet storms (broadcast storms) in the OT network.
System Security Layer
The activation status of the Secure NAT mode, which provides full isolation between networks and optimizes cyber security, IP routing (IP Tables), and access control lists (Access Lists) are controlled here.
4. Configuring Industrial IP and DHCP/DNS Settings
In order for PLC, SCADA, HMI panels, or IP cameras positioned on the field to automatically receive IP addresses via HUBBOX or to integrate into existing local automation network rules, IP settings (Network Settings) must be configured.
When you click on the settings gear icon on the network details page, configure the following parameters from the panel that opens on the right side:
- DHCP Status: Set the option to
Yesif you want IP addresses to be automatically distributed to the edge devices on the field. - DHCP IP Pool Range: Limit the IP block in which the devices will be addressed:
• Starting IP Address:192.168.24.100
• Ending IP Address:192.168.24.200 - DNS Servers: Enter global or local DNS addresses to ensure fast resolution of name queries within the network:
• DNS Server 1:8.8.8.8(Google DNS)
• DNS Server 2:8.8.4.4
To push (apply) the configured settings instantly to the Smart Router hardware on the field, you can click the button at the bottom of the panel:
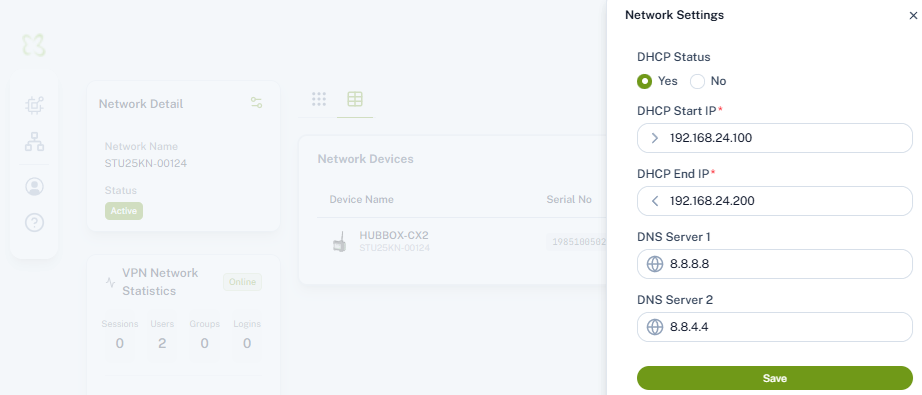
Image 4: HUBBOX Cloud Panel - Local DHCP Network Pool Configuration Window
Apply Configuration to Field (Save)